This post creates two web dynpro components each having two windows and each window embeds a view within the web dynpro component.
________________________________________________________________________________
Step1. Go to Tcode- SE80.

Step2. Provide a web dynpro component name and hit the key board Enter button and from the Pop up click on the Yes button to continue with the creation process.

Step3. Provide a description. Automatically the system suggests the window and view name. If u want change the name and continue by clicking on the Yes button.

Step4. Save as Local Object.

Step5. Double click on the Web Dynpro component name and click on the Activate button and the status will be active.

Step6. In order to a web dynpro component participate in the FPM application it has to implement the interface 'IF_FPM_UI_BUILDING_BLOCK' . So Click on the Implemented interface tab and provide the interface name as 'IF_FPM_UI_BUILDING_BLOCK' and hit the Enter button from key board. Enter the Re implementation button to implement the interface.

Step7. The status turns into green.

Step8. Expand the View option from the left hand tree under the web dynpro component and double click on the view 'MAIN_VIEW'.

Step9. Right click on the ROOTUIELEMENTCONTAINER button in the right hand side to create some UI element in the view. Select the Insert Element option.

Step10. Provide a ID and select type as Text View.

Step11. The TextView element is added on the View. The element property provides certain option.
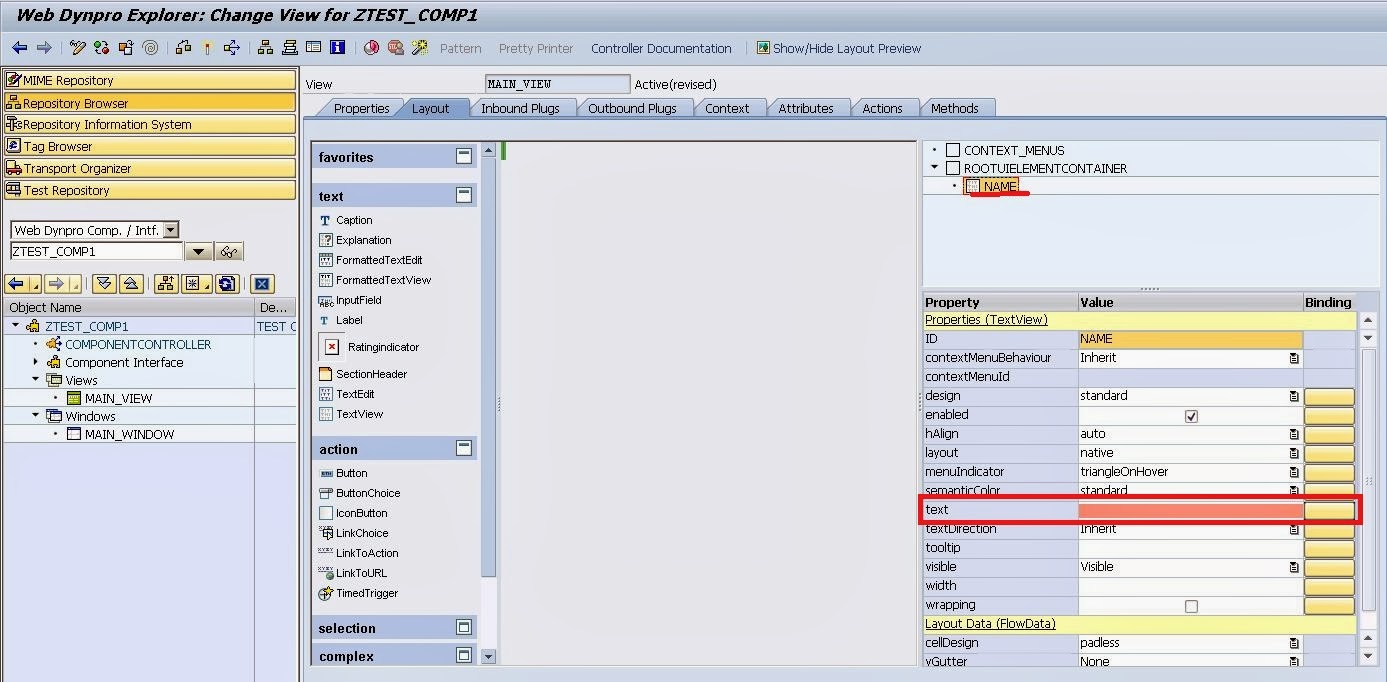
Step12. Provide some text definition in the Text option and hit the Enter button. The text will appear in the View.

Step13. Right click on the View Option in the left hand tree and click on the create option to create a new view.

Step14. Click on Yes to continue.

Step15. Provide the view name and description and hit the Continue button.

Step16. The New view appears.

Step17. Right click on the ROOTUIELEMENTCONTAINER button in the right hand side to create some UI element in the view. Select the Insert Element option.

Step18. Provide a ID and select type as Text View.

Step19. The TextView element is added on the View. The element property provides certain option.

Step20. Provide some text definition in the Text option and hit the Enter button. The text will appear in the View.

Step21. Right click on the Windows Option in the left hand tree and click on the create option to create a new window.

Step22. Provide the new window name, description and click on the Continue button.

Step23. Save it.

Step24. Teh window status changed from New to Inactive.

Step25. To Embed the second_view in the window, Right click on the window and select Embed_view option.

Step26. Click on the F4 button.

Step27. Selectg the View name and double click on it.

Step28. The view in assigned to the window. Click on continue button.

Step29. The SECOND_VIEW is embedded to the SECOND_WINDOW.

Step30. Double click on the Web dynpro component and the status is Inactive.

Step31. Right click on the Web Dynpro component name and from the option click on Activate.

Step32. Click on Continue button.

Step33. The status is active.

Step34. Similarly create a second web dynpro component. Provide a web dynpro component name and hit the key board Enter button and from the Pop up click on the Yes button to continue with the creation process.

Step35. Provide a description. Automatically the system suggests the window and view name. If u want change the name and continue by clicking on the Yes button.

Step36. Save as Local Object.

Step37. The status is inactive. click on the Activate button .

Step38. Click on Yes button.

Step39. The web dynpro component is active.

Step40. In order to a web dynpro component participate in the FPM application it has to implement the interface 'IF_FPM_UI_BUILDING_BLOCK' . So Click on the Implemented interface tab and provide the interface name as 'IF_FPM_UI_BUILDING_BLOCK' and hit the Enter button from key board. Enter the Re implementation button to implement the interface.

Step41. The status turns into green.

Step42. From the left hand tree, double click on the window 'first_window'. The window embeds the view.

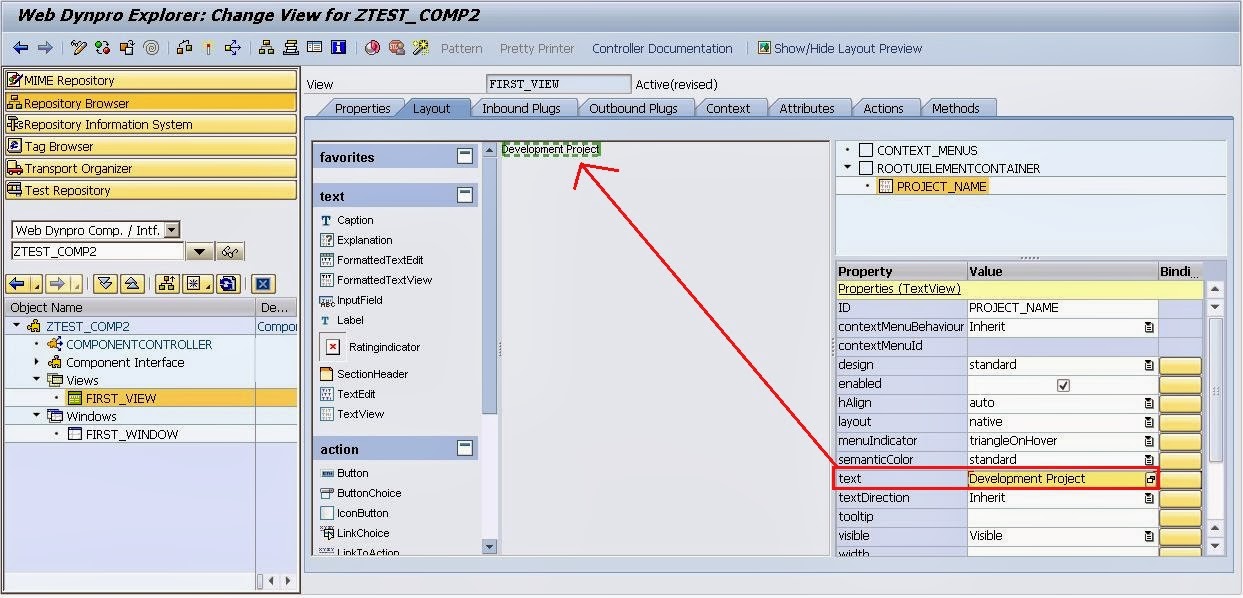
Step43. Double click on the view 'FIRST_VIEW' from the left hand tree.

Step44. Right click on the node 'ROOTUIELEMENTCONTAINER' and select the option Insert Element.

Step45. Provide any ID name and select type as TextView and click on the Continue button.

Step46. The ID property provides some properties in the right hand side.

Step47. Provide some text in the Text tab and hit the Enter key from key board. The Entered text appears on the View.
Step48. Right click on the View Option ion the Left hand tree and select create option to create a new view.

Step49. Provide the View name and description and click on the Continue button.

Step50. The View Appears.

Step51. Right click on the node 'ROOTUIELEMENTCONTAINER' and select the option Insert Element.

Step52. Provide any ID name and select type as TextView and click on the Continue button.

Step53. The ID property provides some properties in the right hand side.

Step54. Provide some text in the Text tab and hit the Enter key from key board. The Entered text appears on the View.

Step55. Right Click on the Windows option from the left hand tree under Web dynpro component and click on Create option.

Step56. Provide the Window name and short description and click on Continue button.

Step57. Expand the window & right click on the Window name and select Embed View option.

Step58. Click on the F4 option.

Step59. From the list select the SECONS_VIEW and double click on it.

Step60. The SECOND_VIEW is assigned to the SECOND_WINDOW.

Step61. The view is assigned to the window.

Step62. The web dynpro component status is inactive.

Step63. Right click on the component name and click on the Activate option

Step64. Click on Continue button.

Step65. The status is active.

Up to this, our web dynpro components are created with necessary windows and also they are enabled to participate in the FPM application by implementing the interface 'IF_FPM_UI_BUILDING_BLOCK'.
_____________________________________________________________________________
Step66. Go to Tocde- SE80.

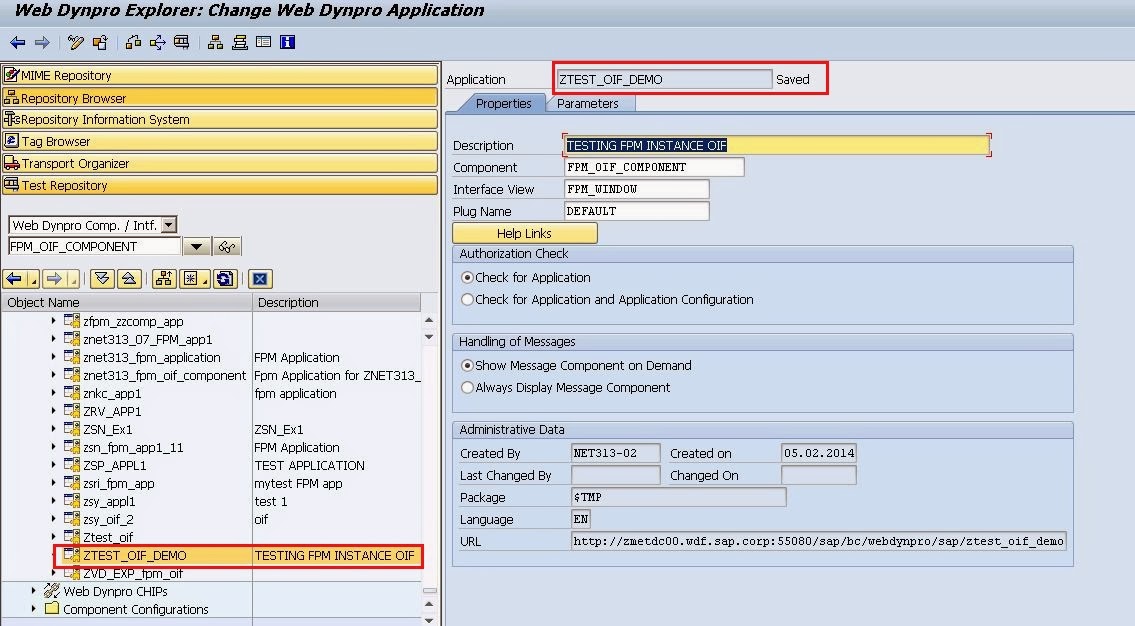
Step67. We are going to create an OIF - FPM Instance. So open the standard FPM Component- 'FPM_OIF_COMPONENT'.

Step68. Go to the Web Dynpro Application option Under the component and right click on it and click on Create option.

Step69. Provide a application name and Description and Click on the Continue button.

Step70. The status is New. Click on Save button.

Step71. Save as Local Object.

Step72. Expand the Web Dynpro Application Option i n the left hand tree and select the above created application.

Step73. Navigate down to locate our application.

Step74. Now our OIF application is present.
Step75. Right Click on the Application and select the Create/Change configuration option.

Step76. The following web browser screen comes up.

Step77. Provide a Configuration ID and hit the Enter button. An error message comes up. Now click on the New Button to create a configuration ID.

Step78. Provide a description and click on the OK button.

Step79. Save as Local Object.

Step80. The following screen comes up. Now click on the Assigned Configuration Name button as highlighted.

Step81. The below screen pop up comes up.

Step82. Provide a Configuration Name and Click on OK button.

Step83. A warning message comes up. Now click on the Configuration Name.

Step84. Click on the NEW button to create the configuration Name.

Step85. Provide description and click on Ok button.

Step86. Save as Local Object.

Step87. The below screen Comes up.

Step88. Under the 'Object instance Schema', there is a main view and under this a sub view. Under the Subview, a UIBB line . Provide the web dynpro component name we created very first in the post. and press F4 button under the Window Name section to select the window name of the Web Dynpro Component.

Step89. Select the view 'MAIN_VIEW'.

Step90. So the OIF instance, contains the main view->sub view->uibb->web dynpro comp->Window.

Step91. Save it .

Step92. Now go to your SE80 screen, Refresh the web dynpro component. Go to the web dynpro application. Expand it. The application contains the configuration ID.

Step93. Righ click on the Configuration ID and click on Test Button.

Step94. The following output comes up.

Step95. Now Go to the Configuration.

Step96. Under the Object Instance Schema, Click on the Sub view button. Now one more UIBB line comes up under the new sub view .

Step97. In theUIBB line, Provide our Web dynpro component name created very first and click on F4 button under Window Name column.

Step98. Select the 'SECOND_WINDOW'.

Step99. Save the configuration. Now the Main view contains two sub views and each sub view contains a UIBB element referring to a web dynpro component->window.

Step100. Go to the Application and right click on the Configuration ID and select the TEST button.

Step101. The below output is displayed. Click on the Sub view 2.

Step102. The output is changed.

Step103. Again go to the Configuration. Select the Main view under Object Instance Schema.

Step104. Change the Main View Name.

Step105. Select the first sub view and change the name.

Step106. Change the sub view name.

Step107. Select the Second Sub View and change the name.

Step108. In th ePreview Section U can see the screen preview.

Step109. Again go to the OIF application and Test the Configuration ID.

Step110. The Main view and sub view name is updated in the output.

Step111. Again go to the Configuration. This time we will be add up a new Main View. Under the Object instance Schema, click on the Main View button.

Step112. The below input fields comes up.

Step113. Provide the Main View Name. Provide our WEB dynpro component- 2 name under the component column in the UIBB line. Click on F4 button under the Window column. Select the First_Window.

Step114. Provide the Sub View name and then click on the Sub View button to add a new sub view Under the Main view2.

Step115. A new input line is inserted in our Configuration.

Step116. Provide the Web Dynpro component-2 name and click on the F4 button under the Window column. Select the Second Window.

Step117. Provide the Sub view name and Save the configuration.

Step118. Again go to the OIF application and Test the Configuration ID. Two main tabs appear in the output.

Step119. Click on the sub view 2 under main view1.

Step120. click on the Main View2.

Step121. Click on the Sub view 2 under Main view 2.

________________________________________________________________________________
No comments:
Post a Comment